https://techacad4u.blogspot.com/p/basic-configuration-of-cisco-switch.html

Download the Packet Tracer Activity File
Objectives
Part1: Configure PC
Part2: Configure a Basic Switch Configuration
Part3: Verify the Connectivity
Part2: Configure a Basic Switch Configuration
Part3: Verify the Connectivity
Topology
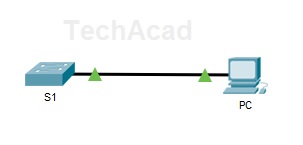
Step1: Assign IP address 192.168.1.10 and subnet mask as 255.255.255.0 for PC
(Completion: 15%)
Part2: Configure a Basic Switch Configuration(Completion: 15%)
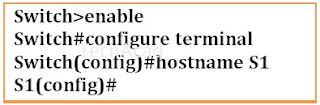
Step 1: Assign a name to a switch.To configure parameters on a switch, you may be required to move between various configuration modes.
Configure the switch name as S1(Completion: 23%)
Step 2: Secure privileged mode access.Set the enable secret password as techacad (Case Sensitive for scoring Mark)
(Completion: 30%)

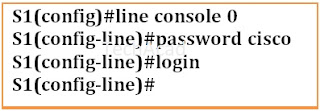
Step 3: Secure access to the console line.
To secure access to the console line, access line mode and set the console password to cisco
(Completion: 46%)
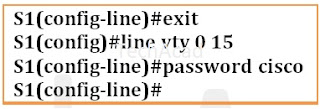
Step 4: Secure access to the vty line.To secure access to the vty line, access line mode and set the vty password to cisco
(Completion: 53%)
Step 5: Encrypt the console and vty passwords.
(Completion: 61%)

Step 6: Configure a message of the day (MOTD) banner.Configure the Banner Message as Warning
(Completion: 69%)

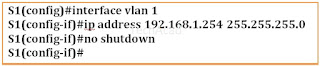
Step 7: Configure Switch Virtual InterfaceConfigure VLAN 1 with ip address 192.168.1.254 and subnet mask 255.255.255.0
Bring the VLAN 1 interface state to up
(Completion: 92%)
(Completion: 92%)
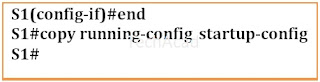
Step 8: Save Configuration Files to NVRAM
(Completion: 100%)
Part3: Verify the Connectivity


No comments:
Post a Comment